
Making Fine Prints
A good print starts off with an excellent original, either film or digital capture. The vast majority of images on this website were made during the last 30 years on various 4x5 films. I've used Kodak and Fuji films, in transparency, color negative, and B&W formulations. The first step for film originals is scanning.
Scanning
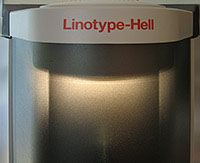
I've been very fortunate to have had access, through the generosity of Bill Atkinson, to a high-end drum scanner, the Heidelberg Tango. When first introduced more than ten years ago, the price for a scanner of this quality was around $70,000. With the help of Joseph Holmes, special profiles were created for this scanner that allow for extra 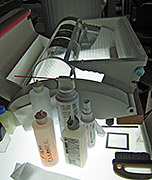 sensitivity in the shadow areas of transparency films. Doing the scans myself lets me adjust the scanner settings to get just what I want in the scan. It is a lot of work, as the film has to be mounted on a transparent drum using a special mounting fluid. Many times I will rescan an original to fine-tune the tonality and/or color. Often I will do "double scans" where I scan once for the highlights, and once for extra shadow detail, and combine these later in Photoshop.
Fine Tuning in Photoshop
Photoshop has a steep and frustrating learning curve, but it allows much more fine control over an image that was possible in the darkroom, even with dye transfer. To "optimize" an image, I usually adjust the shadow and highlight end points, the contrast in the image, and overall color balance. After these global corrections, I can then select various areas to lighten, darken, or change contrast. This is very similar to the dodging and burning I used to do in the darkroom. Let's say I wanted to darken the edges of an image, a very common adjustment. In the darkroom, it could take up to half a day to reprocess the print to see the change. With Photoshop, the results can be seen on the monitor—in real time! This allows for a great increase in the fineness and sensitivity of the adjustments.
When I think the image is starting to look good onscreen, I'll then make some proof prints. Depending on the image, it can take many iterations to achieve the desired result. When it finally starts to "sing", I save the Photoshop "master" file, with all adjustment layers intact, in case I want to make any further refinements.
Printing
To make excellent prints, you need excellent printers.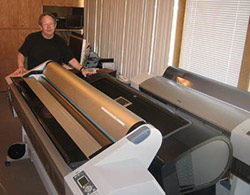 And printers are getting better and better every year. (I complain that it's getting too easy to make good prints!) On the left is my stable of printers (although I have found a new home for the Epson 9800 on the right—too crowded!) So that leaves me an Epson 11880, and the HP Z3100, both superb printers. And they excel in different situations, so I'm glad to have both. I usually print on papers such as Ilford Smooth Pearl, which gives excellent blacks, with a very nice surface texture and minimal bronzing. In its time, dye transfer prints were considered very archival, but the newest inksets from Epson and HP are rated to last 2-3 times longer than a dye transfer print. This is a great time to be a photographer!